A deck remodel can change how people reach the pool, even when the existing fence stays in place. Before finishing the new surface, recheck the full barrier path, every connection, and each route from the house or yard.
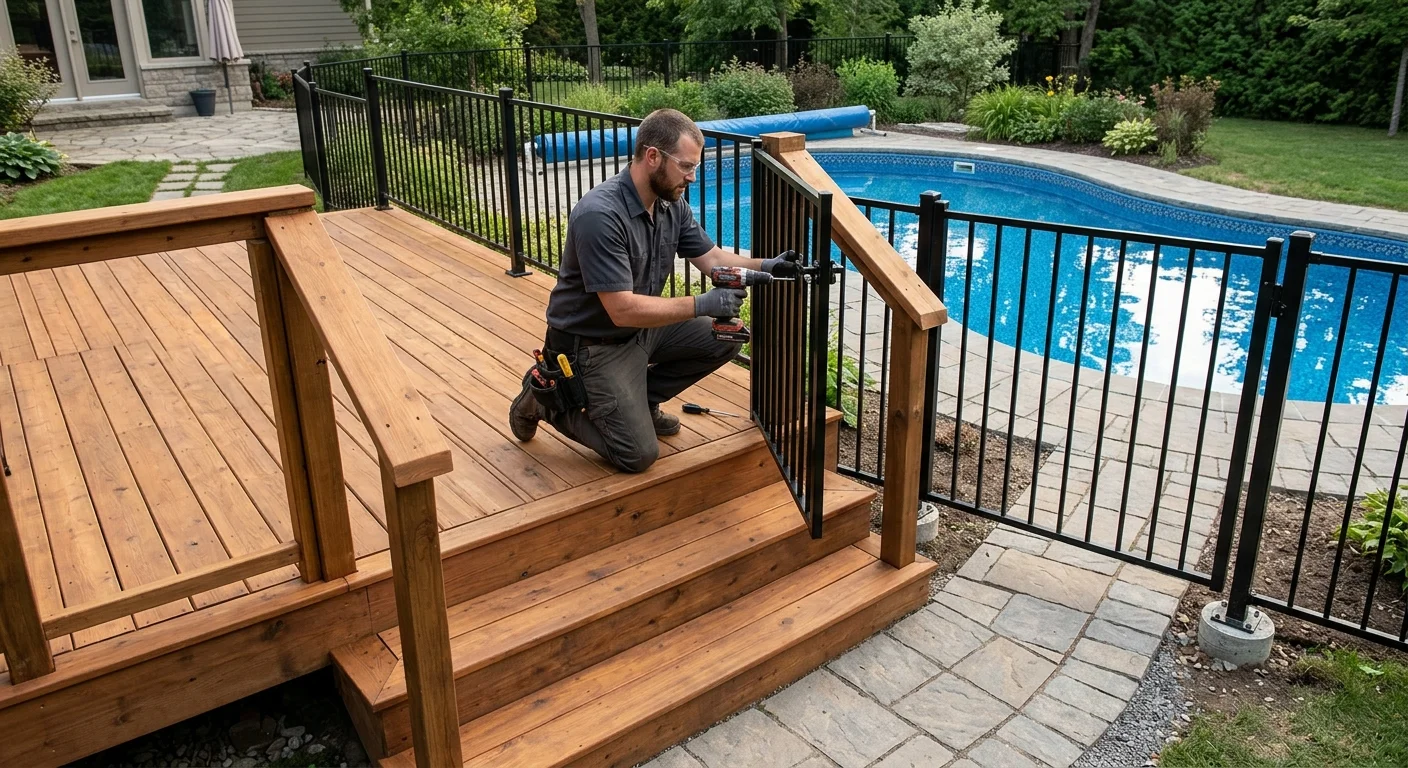
How a changed deck layout can affect the barrier plan
The old pool fence was arranged around the previous deck. Moving an edge, adding steps, or changing a walkway can alter that arrangement.
Start by tracing the barrier as one continuous line. Follow it from section to section without skipping corners, walls, gates, or attached structures. Note every place where the remodeled deck meets that line.
A raised surface may change the relationship between the deck and fence. A widened deck may bring seating, planters, built-in features, or walking space closer to the barrier. A new stair landing may direct people toward a different side of the gate. None of those details confirms a legal problem by itself. They do show where a fresh review is needed.
Look beyond the fence panels. The pool barrier plan includes transitions and access points. A solid section can appear unchanged while the route around it has shifted. Someone may now approach the pool from a side yard, outdoor room, or lower patio that wasn’t part of the old traffic pattern.
This matters across San Diego County because remodel layouts vary widely. A compact yard in National City won’t be planned like a larger property near Poway. A narrow coastal lot in Encinitas may leave fewer options than an inland yard near El Cajon. The governing authority also depends on the property address.
Mark the new deck footprint before removing anything. A licensed contractor can then compare the proposed layout with the existing pool fence and safety barrier as a complete system. That comparison should happen while changes are still practical, not after every finish is installed.
What to document before existing sections are removed
Good records preserve details that disappear during demolition. They also help a fence contractor understand what changed and why.
Take wide photos from the house, pool area, side yard, and each approach to the deck. Then photograph every post, panel connection, gate, latch, hinge, step, and change in elevation. Include the point where the barrier meets a wall or another structure.
Use a tape measure for project planning, but don’t treat your measurements as a compliance decision. Record the fence height from both sides, the space beneath sections, visible openings, gate width, and distances near the new deck edge. A contractor and the local reviewing authority may need to measure from specific locations.
Save a simple drawing of the old layout. It doesn’t need polished drafting. Show the pool, house, doors, deck outline, gates, steps, side-yard paths, equipment area, and property boundaries as you understand them. Label uncertain boundaries rather than guessing.
Also save the deck plans, permit paperwork, contractor scope, product information, and any earlier pool documents you have. Note which fence parts will be removed temporarily. Record whether those parts are intended for reuse.
If a post looks loose, a panel is bent, or hardware no longer aligns, photograph that condition separately. A fence repair contractor may be able to retain some sections, but the decision depends on their condition and fit within the revised layout.
Don’t discard hardware until the new plan is settled. Keep removed parts grouped and labeled. That won’t make every component reusable, but it gives the contractor a clearer basis for comparison.
How gates, steps, doors, and yard access need review
The gate deserves more than a quick open-and-close test. The deck remodel may change its approach, swing path, landing, or alignment.
Open the gate from several normal positions and let it move without pulling it shut. Watch the hinges, latch, bottom edge, and nearby deck surface. Note rubbing, dragging, bouncing, or a latch that only catches when pushed. Our guide to a pool gate that won’t self-close explains the observations worth recording.
Next, stand on both sides of the gate. Look for new steps, furniture zones, counters, planters, rails, or grade changes that affect access. A gate that operated before construction may behave differently after posts are disturbed or surrounding surfaces change.
Review each set of steps as its own transition. Document the top landing, bottom landing, handrail area, and the path leading toward the pool. Don’t assume the fence line alone controls access. The remodel may create a route around one end or through another part of the yard.
Doors also belong on the plan. Mark every house, garage, side-yard, and outdoor-room door that reaches the remodeled area. Note whether the project adds, removes, or relocates an opening. The local authority can explain how those openings affect the property’s current barrier review.
Walk the yard like a visitor who doesn’t know the old layout. Begin at the driveway, side gate, back door, and any lower patio. Follow each natural route toward the pool. That exercise often reveals a changed access path that’s easy to miss on a plan.
Don’t declare the barrier compliant because the gate latches once. Appearance and one successful test can’t settle current requirements or the complete access plan.
Which current requirements need confirmation for the property
Current requirements still need confirmation for the exact address and project. Do not rely on a neighbor’s remodel, an old inspection note, or measurements remembered from another city.
California Health and Safety Code section 115923 is the sourced enclosure list used on this job: gates that open away from the pool, self-closing, self-latching, latch no lower than 60 inches above the ground; minimum height 60 inches; maximum 2 inches from ground to the bottom of the enclosure; no gap that passes a 4-inch sphere; outside face without handholds or footholds that would let a child below age five climb over. Photograph the remodeled deck against that list. Do not declare the property compliant from the photos.
Section 115922 applies when a building permit is issued for construction or remodeling of a private single-family pool or spa. It requires at least two of seven drowning-prevention features, with pairs that do not count. A deck-only remodel is not automatically that permit. Ask the building official whether this project puts those features back in review.
If the property lies within the City of San Diego, ask Development Services which current rules apply. For Chula Vista, Encinitas, El Cajon, or another incorporated city, contact that city’s building authority. For an unincorporated address, use the County desk. City Table 142-03A (fence-division building permit at 7 feet) and County PDS 070 (6-foot fence exception plus zoning heights) are fence-construction notes. They are not a substitute for pool-barrier review.
Give the reviewer the address and a clear project description. Explain whether the deck footprint, elevation, stairs, doors, fence sections, posts, or gate locations will change.
Questions should cover the complete plan:
- Where should barrier height and openings be measured after the new deck elevation?
- How should changed deck elevations be considered?
- What gate operation and hardware need review?
- How should doors and side-yard access be handled?
- Which documents or inspections apply to this address?
Our California pool fence code guide can help organize those questions. It does not replace the authority reviewing your property.
When selecting a contractor, confirm the license through the California Contractors State License Board license check. Fence Pros San Diego is a referral service. The homeowner contracts with and pays the independent professional directly.
What a pool fence pro needs to compare repair and replacement
A useful repair-versus-replacement review starts with the old layout and the approved deck plan. The contractor needs to see both, not just the fence after demolition.
Provide your photos, measurements, drawings, permit documents, and notes from the local authority. Identify which parts must move and which parts you hope to keep. Mention future deck features that aren’t visible yet, including stairs, built-ins, seating areas, and finished surfaces.
The contractor should compare each existing component with its proposed position. That includes posts, panels, gates, hinges, latches, connections, and transitions into other structures. A section may remain serviceable but no longer fit the revised route. Another may need only hardware or alignment work. The licensed professional should explain that distinction after inspecting the site.
Ask for repair and replacement options to be separated clearly. Each option should identify the sections involved, the proposed gate locations, the materials being retained, and any assumptions that still need approval. Don’t compare proposals by the final total alone. Compare the scope, exclusions, access plan, and responsibility for restoring deck finishes.
Masonry walls need separate attention. The verified CSLB C-13 fencing classification covers fences, railings, barriers, posts, and gates, but excludes masonry walls. If the remodeled barrier connects to masonry or requires masonry changes, ask which properly licensed professional should handle that part.
Coordinate the deck and fence scopes before either contractor closes access to posts or connection points. Confirm who removes existing sections, who stores them, and when the revised barrier can be assessed. Avoid leaving those decisions as verbal assumptions.
The right outcome may be targeted repair, partial replacement, or a new layout. That choice can’t be made from appearance alone. It depends on the existing condition, remodeled access, confirmed local requirements, and the contractor’s site review.
When to call us
Call when a deck remodel moves a pool fence, changes a gate approach, or creates a new yard-access route. Call us at (858) 400-4906 and we’ll connect you with a licensed fence contractor.